|
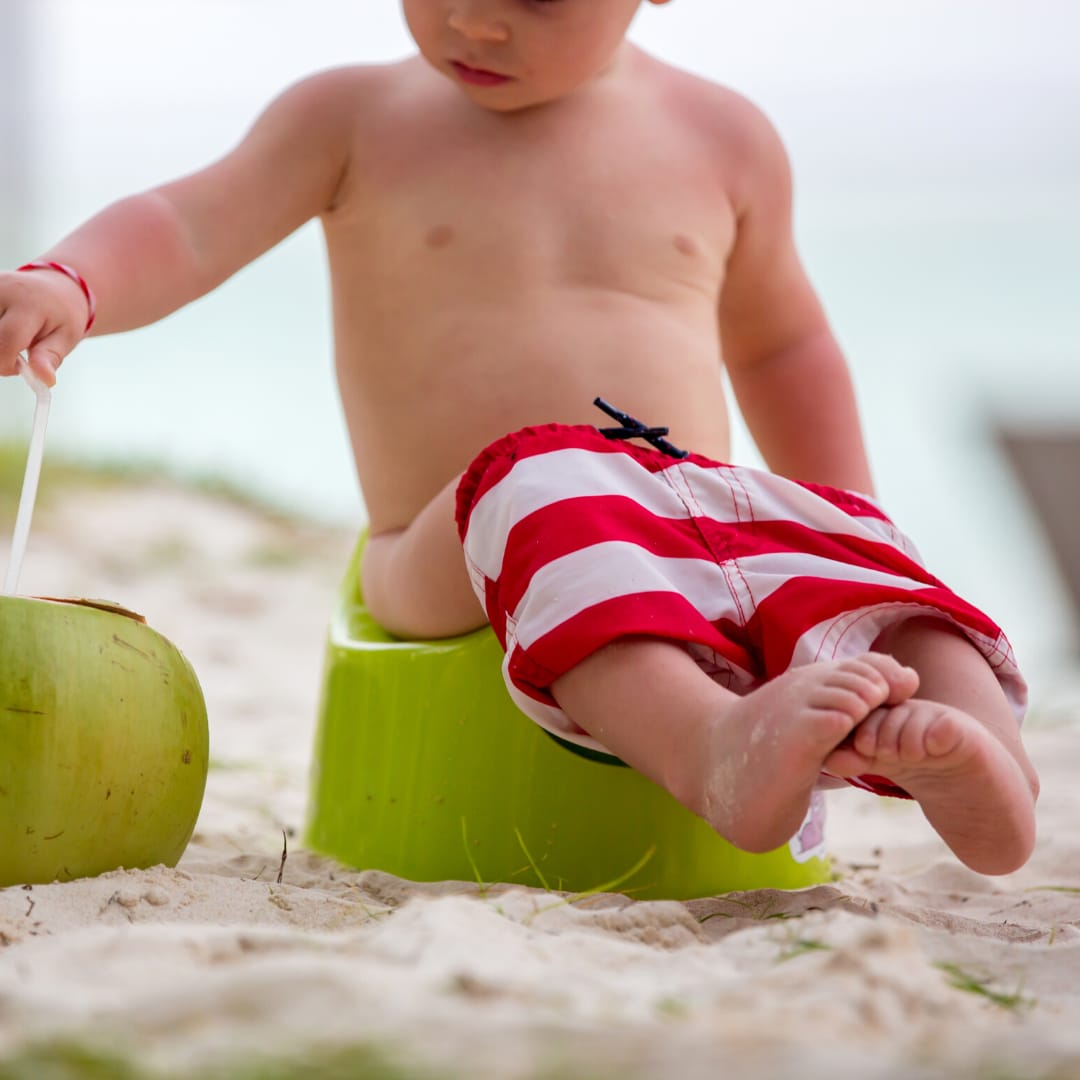
We get asked all the time at Little Starlings, "When is it a good time to start potty training?" So we thought we'd share with you some really useful tips that we advise our parents, that I also used with my own children when they were ready for big pants!! Firstly, the key is identifying when your child is ready. There really is no right or wrong age to begin potty training it's very individual to your own child as they are all ready at different times. Just to give you an idea, parents typically start to potty train around two-three years old. On average a potty trained child is around 27 months old. I always tell parents that if it takes weeks to potty train your child they're just not ready, its almost worth waiting those few extra weeks to get it right in half the time. Picking a half term or a longer holiday period, is generally a great time to start, as you have longer stretches of time at home which can really help to keep the process as stress free as possible for everyone. There is nothing worse than potty training whilst still needing to go on car journeys...or on the school run. Book in some time to be at home as much as possible so it's easy and quick for them to get to a potty in an environment they are already comfortable in. Here are some signs that your little one is ready for their potty training journey: Is your child dry for two hours? Does your child tell you when they have a wet nappy? Does your child ask to use the potty? Are your child's poos regular? Do they ask to wear pants? Can your child follow simple instructions? Does your child tell you when they need to go? Can they pull up/down their own pants? It's all about your little ones understanding a little about what's going on and how much they can communicate. It's important to remember if potty training is started too early and it doesn't work out it can cause a lot of anxiety and stress for you both. So if your child is pulling at their nappy and showing you they're uncomfortable with a soiled nappy, maybe hiding when they've done a wee or poo. Showing you they are interested in using the potty or toilet by asking questions or they have good bladder control. These are all positive signs that they might be ready to take the next step. Remember there is no pressure to be potty trained by a certain time and that every child is unique. The fun part is buying those first spider-man or princess pants, and stock up as you'll get through a lot of them in those early days 😀 www.pull-ups.com/en-us/potty-training/when-to-start/6-signs-your-child-is-ready pottytrainingacademy.co.uk/ #pottytraining #socialemotionaldevelopment #balhamlife #toddlerlife #pullups
0 Comments
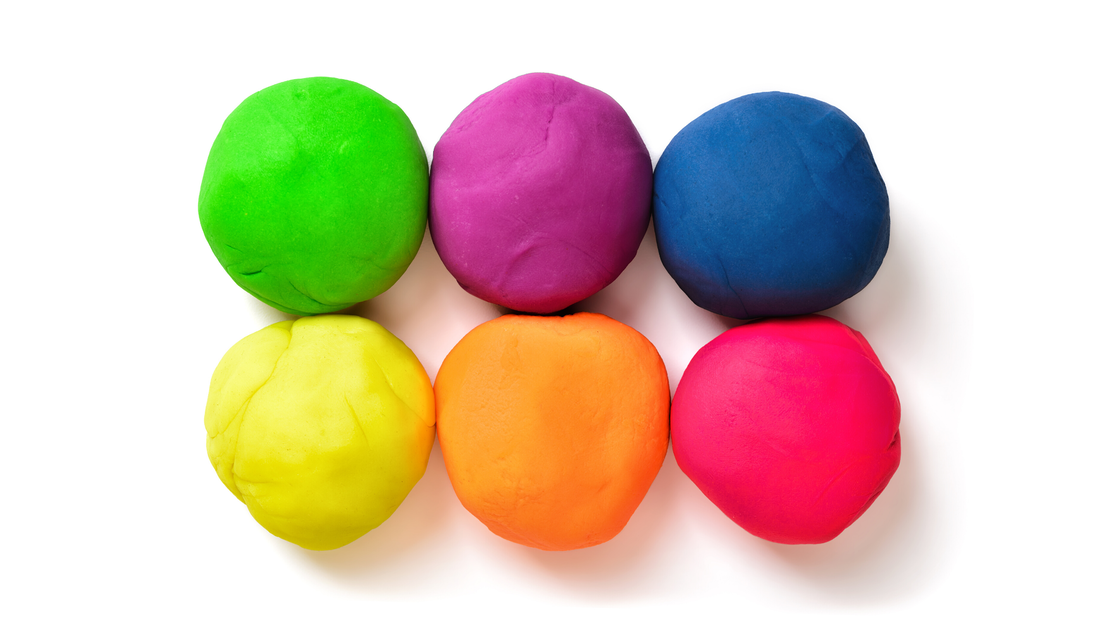
Play dough, is universally loved and provides amazing sensory feedback for children, as well as providing endless playful learning opportunities.
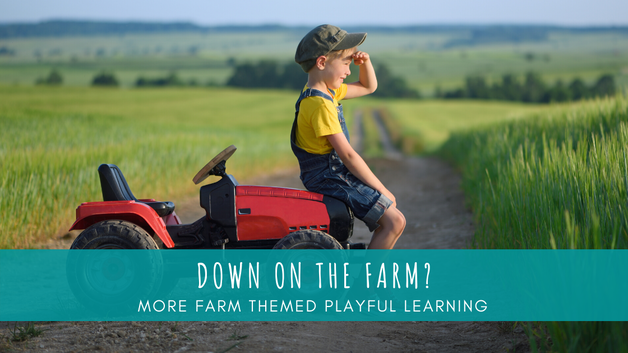
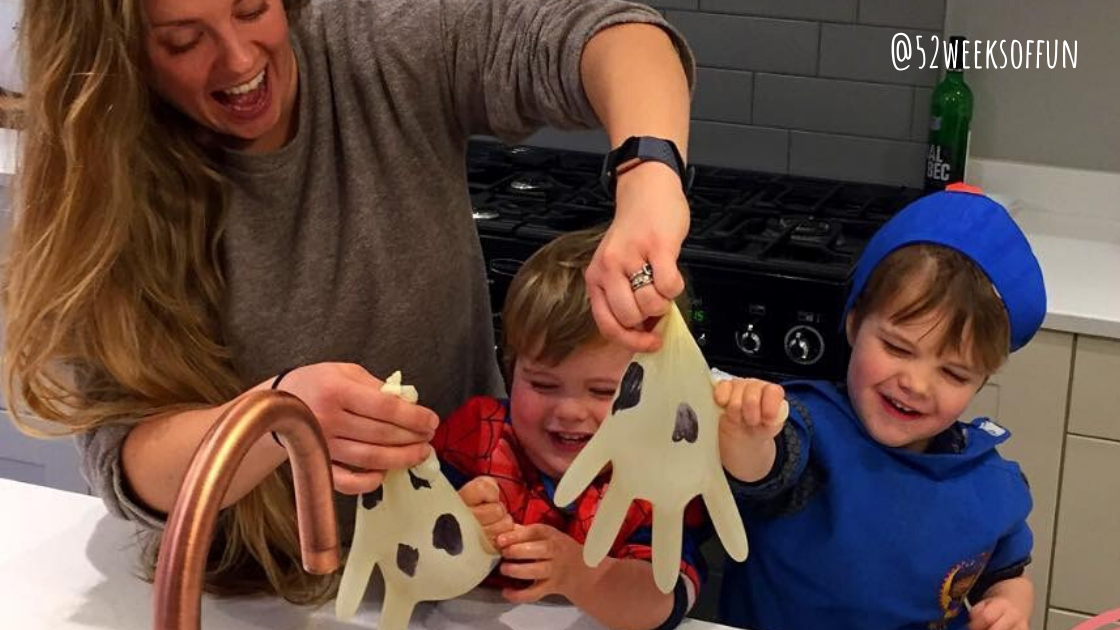
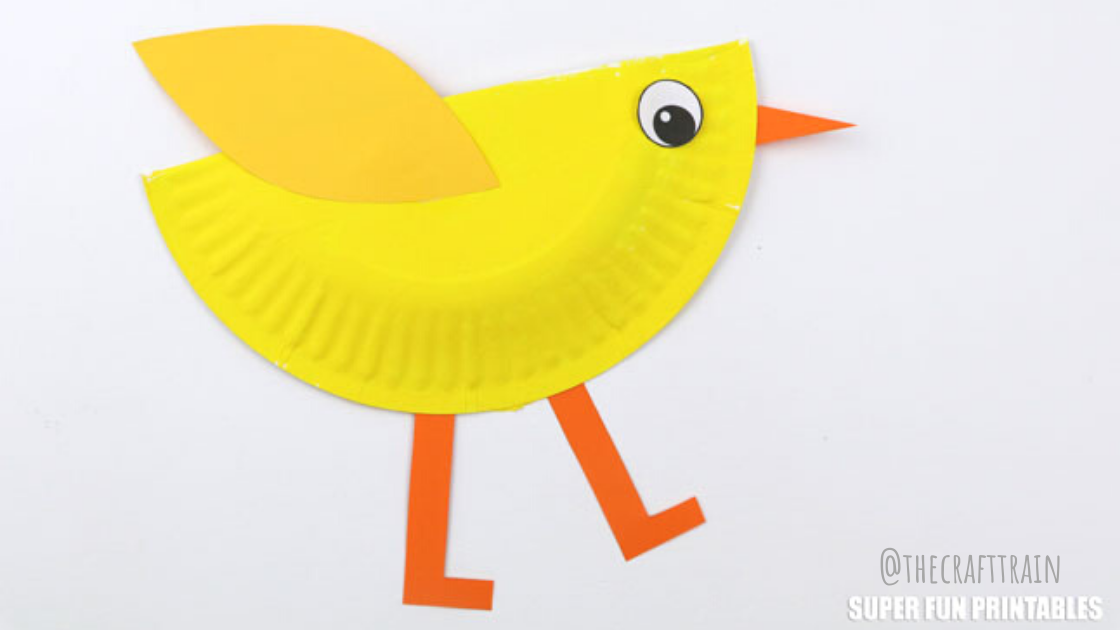
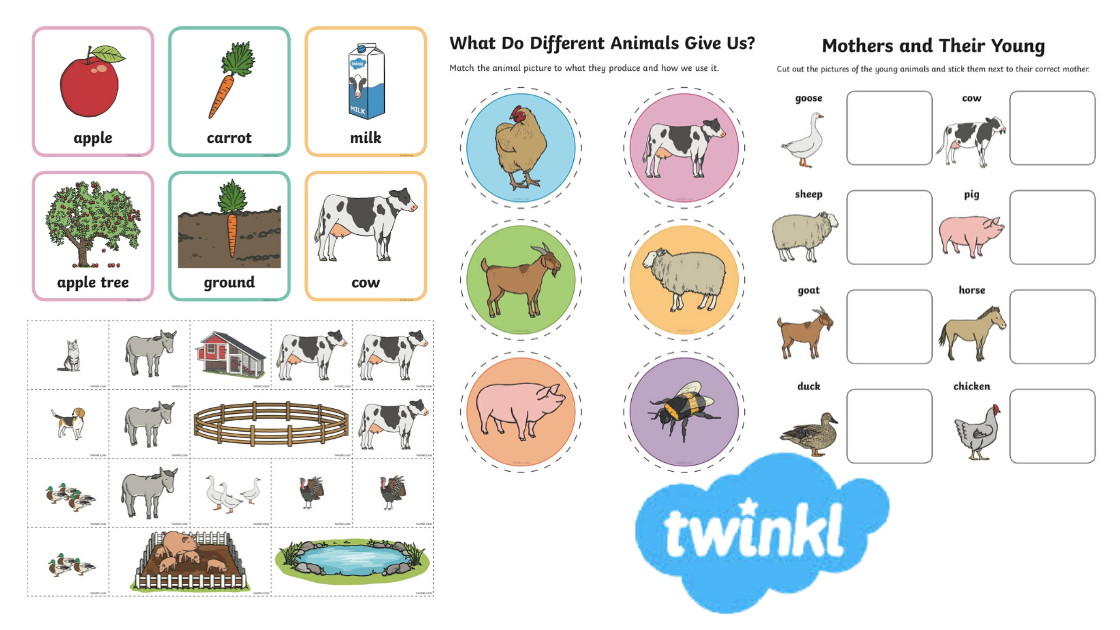
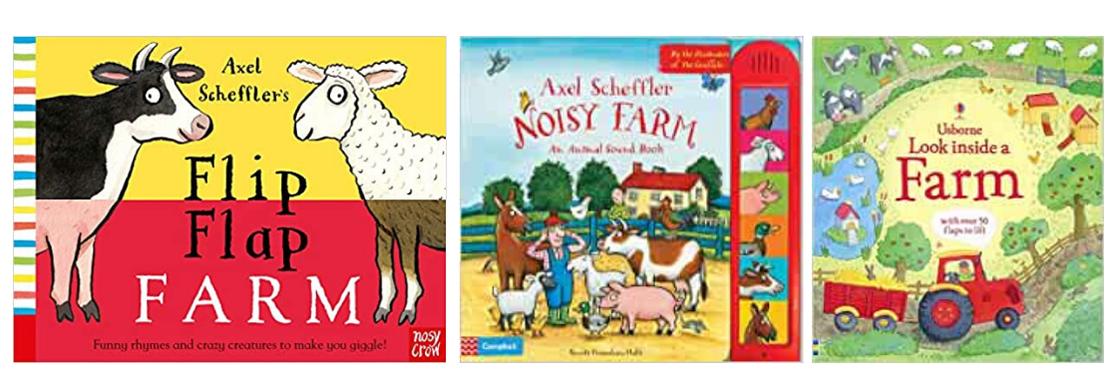
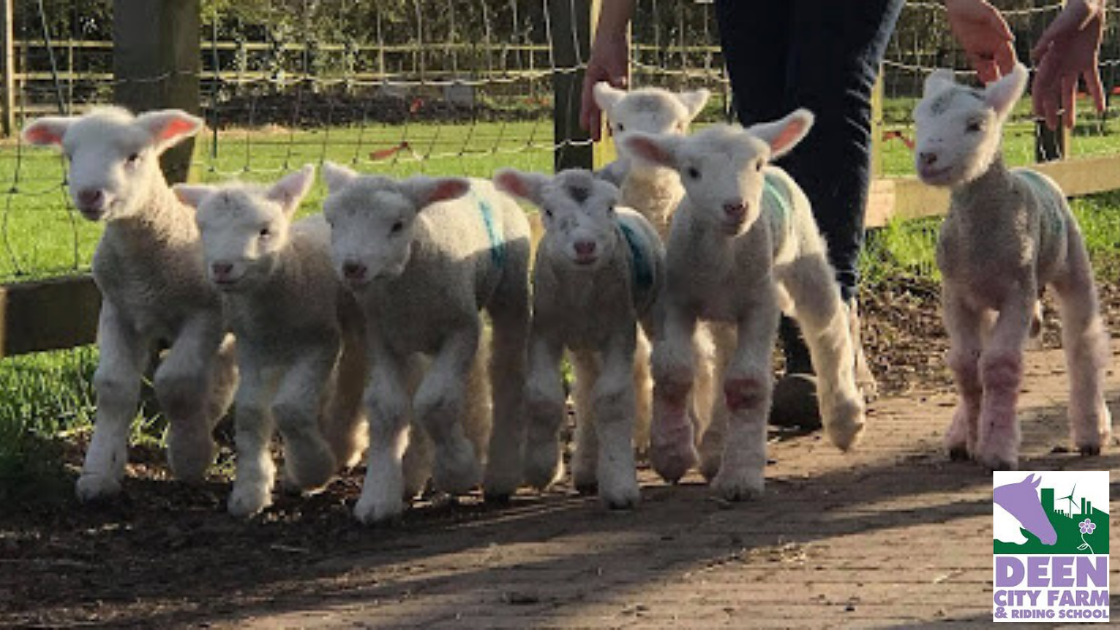
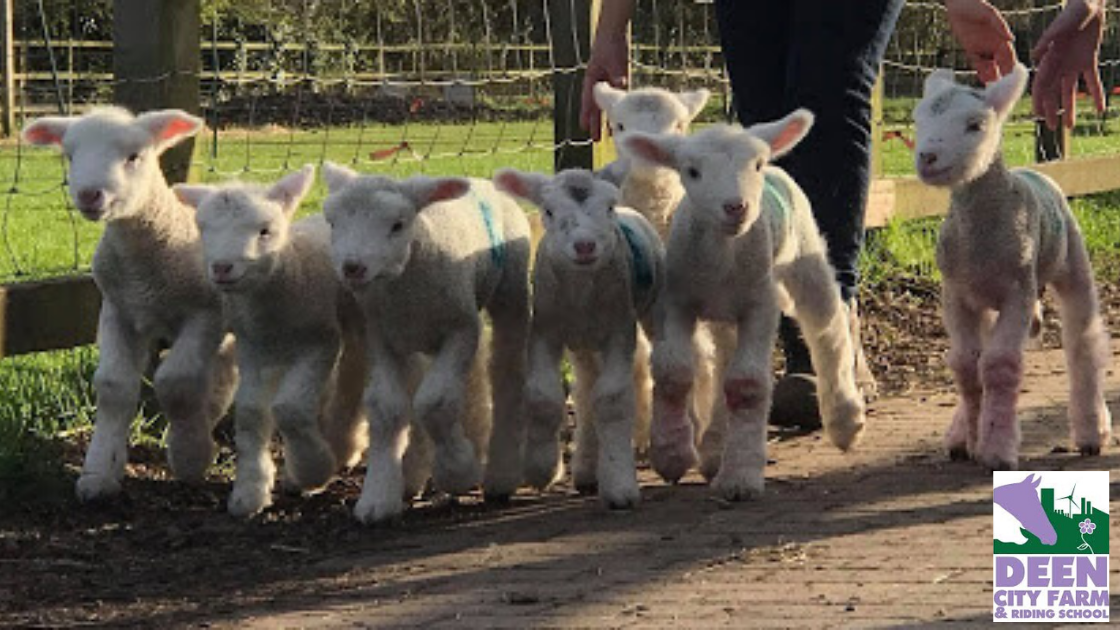
But if like us, you don't really like the idea of children playing with a synthetic dough (particularly if they are prone to tasting), nor do you fancy forking out for endless pots of commercial dough, you'll love this quick, fuss-free play dough recipe that we use. 1 cup plain flour 1/4 cup table salt 1 TBSP cream of tartar 1 TBSP of vegetable oil (melted coconut oil works too) 1/4 cup of boiling water Food colouring* Put all of your dry ingredients in a large bowl, add the oil. Depending on what type of colouring you are using, you might want to add it now, or you can dissolve the colour in a little bit of the boiling water. Next slowly add the boiling water, mixing as you go, until to get to the desired consistency. Remember as it's a warm dough it will be a little bit more sticky initially, but this will change quickly as the dough cools. Knead the dough for a few minutes on a cool surface before adding extra flour or you could end up with a dry, crumbly dough. If you do need to add any extra flour, lightly sprinkle some into the bowl or on the surface you are working on. Then work the dough over the flour, incorporating it in slowly. Store your dough in the fridge, in an air tight container. The dough should last approximately 3-4wks. *We use often use KoolAid sachets, which give the dough the most amazing smell & great colours too. But we also use plain liquid or gel food colours, which you can find in all large supermarkets. You might just need to adjust the water:flour balance depending on what colouring you chose to use. We get our KoolAid sachets on Amazon, we've linked some in our favourites list. Don't be temped by the large tubs, they continue sugar which makes for a very sticky mess & an unusable dough. I’m yet to met a toddler who doesn't squeal with delight when talking about going to visit the farm! Our Little Starlings children absolutely love learning about what’s going on at the farm and they are always keen to create some amazing artwork while they learn about who lives on the farm. As we’re all still in lockdown we thought you might like a few more ideas that can bring our playful farm learning to your place. GLOVE “COW” MILKING ACTIVITYMilk is a very familiar product for our little ones, but where does it come from? This fun activity is a great why to show little ones how we get milk from a cow. It’s also great for hand strengthening and developing hand-eye coordination. To ‘milk’ your cow you will need: Container Clean rubber glove(s) Black Sharpie Pen Water Needle To get started decorate your glove(s) with cow print spots to get into the theme. Then using a needle, prick the end of one or two fingers of the glove. Depending on the thickness of your gloves, you may need to stretch the hole with the needle in a circular motion to widen the hole. Fill the glove with water and tie the open end of the glove so that it holds the liquid without spilling. The fun part is to allow the child to grasp and squeeze the fingers downward to simulate milking a cow. You can attempt to fill a small glass with the “milk.” This is bound to be lots of fun so please don't forget to share your giggles and videos with us. CHICK CHICK CHICKENNo farm would be complete without a flock of Chickens. Here is a super quick and easy craft idea to create your own flow of little baby spring chickens. You will need: Paper plates Paint (or paint sticks for a quicker, less messy activity) Paintbrush Scissors Glue stick Printable template Head over to The Craft Train & print out their chick printable template. https://www.thecrafttrain.com/paper-plate-chick-printable-template/ Then cut out the beak and legs from orange card, the wing shape from yellow card and get a googly eye or sticker eye ready. Next paint your plate yellow. Once it’s dry, cut in half then you’re ready to start assembling. TWINKL GAMES AND ACTIVITY SHEETSWhy not see if your little ones can point out the babies and match them to their babies cow=calf sheep=lamb horse=calf These activities encourage language and understanding of our world by explaining where our food comes from at the farm...milk from cows, honey from bees, which animals lays eggs to eat? They may be too young to fully grasp this right now but it's never too early to start and the children love that conversation and interaction with you. You'll probably have a, much needed, giggle with some of their answers! The Twinkl free access code during lockdown is: PARENTSTWINKLHELPS LINK: https://www.twinkl.co.uk/resources/home-early-years READ ABOUT THE FARM Here are some of our favourite books about the farm to read with little ones. Great for encouraging language development and understanding. https://www.amazon.co.uk/dp/0230766803/ref=cm_sw_r_apa_i_kmwUEbY6QYBM8 https://www.amazon.co.uk/dp/1409566188/ref=cm_sw_r_apa_i_HmwUEbJDMYBP4 https://www.amazon.co.uk/dp/1509866949/ref=cm_sw_r_apa_i_VmwUEbHA2CD14 https://www.amazon.co.uk/dp/0857632450/ref=cm_sw_r_apa_i_9mwUEb3CR0310 DEAN CITY FARMOf course when it's safe to venture back outdoor, why not visit our lovely, local Dean city farm, which is just perfect for little ones. We’re so lucky to have this on our doorstep, it's a hidden gem in the middle of Merton SW19.
They offer meet & greets with the animals, pony rides, pig feeding and even have a wonderful riding school for adventurous older children. It's a perfect local day out with a cafe too for ice-creams. We hope you've had as much fun as us learning about all the fun at the farm. It's a huge hit with the kiddies as well as educational. Dean City Farm is a registered charity (no. 1008028), supported by Merton Council, but rely heavily upon donations from visitors and the local community to help us carry out the work and look after the animals. With the closures due to COVID-19 they are really struggling at the moment, if you are able to support them in anyway, they would be hugely grateful. Here’s their donation link: https://www.justgiving.com/campaign/savedeencityfarm Let’s hope we can keep this amazing rural oasis on our doorstep for many years to come and enjoy. Don't forget to share your animal stories and pictures with us. Have a great weekend and stay happy As we reach the end of another lockdown week at home who's up for fun garden scavenger hunt to carry on our week of playful learning about "who lives in the garden".
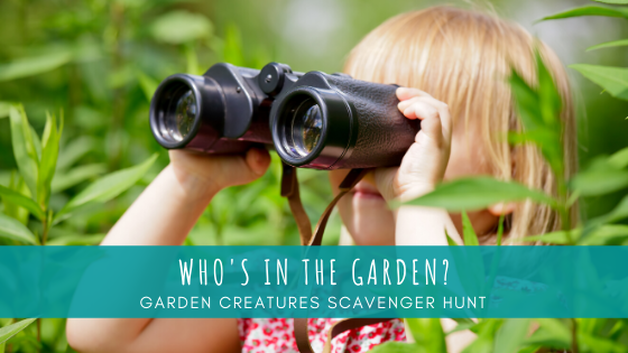
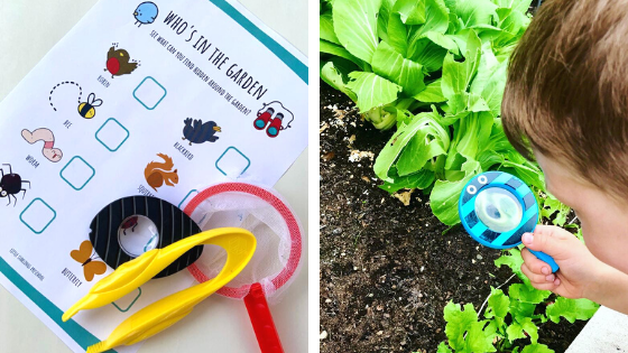
Scavenger hunts are lovely little activities to do, especially with this glorious weather we're enjoying. To carry on with this week's theme, we have created a downloadable spotters checklist for you to print off (https://bit.ly/2YGFafb), grab a little magnifying glass or toy binoculars if you have them and send your little ones off to explore in the garden. It's a great way to encourage children to observe living things, teach them to be patient (it's not always easy!) develop their language and social skills. Great for asking lots of questions...is it furry, slimy, how many legs can you see....does it jump, run or fly? So we have some interesting facts about what you might find in your garden... DID YOU KNOW: Bees have 5 eyes and 6 legs🐝 A worm has no eyes, legs or arms Spiders have 8 legs whilst insects have 6🕷 Ladybirds are a type of beetle🐞 Butterflies attach their eggs on leaves with special glue 🦋 Blackbirds eat insects, grain and fruit 🐦 Squirrels eat mostly nuts, fruits and seeds🐿 Robin's eggs are a light blue colour 🥚 These scavenger hunts are always a huge hit in our house as the children are always amazed at what lives in their garden. Happy hunting 🐛 Our Summer term has arrived and with it brings a little apprehension but hopefully lots of sunshine and positive vibes knowing that each day we are a little closer to coming out of this the other side.
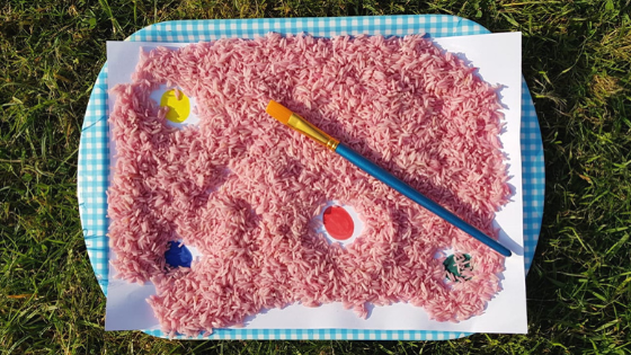
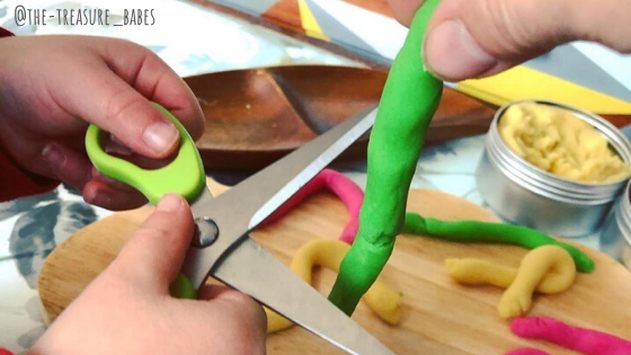
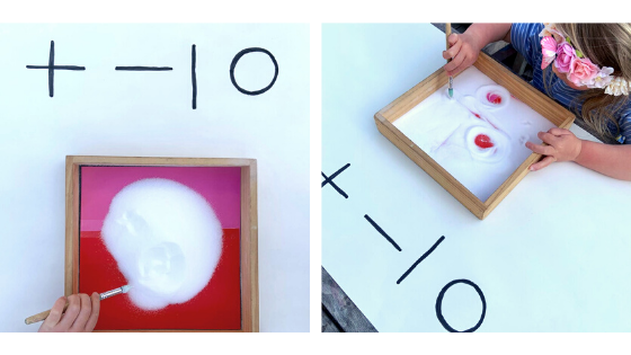
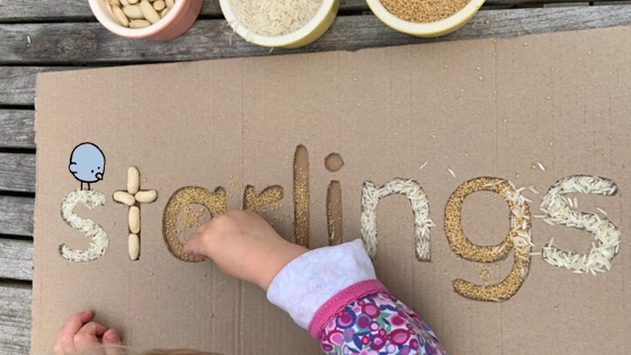
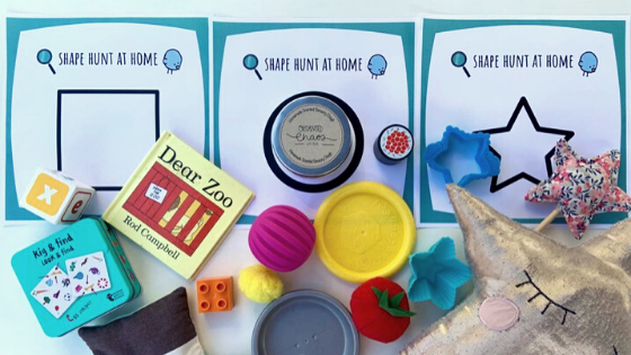
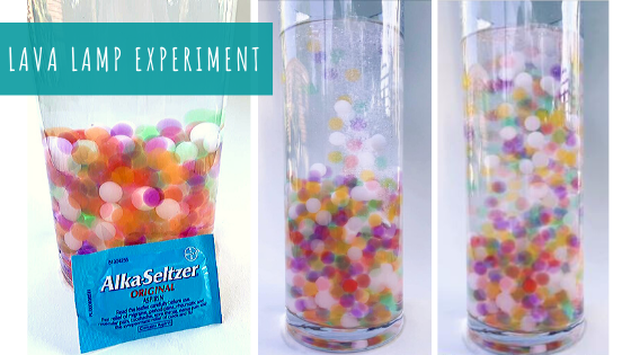
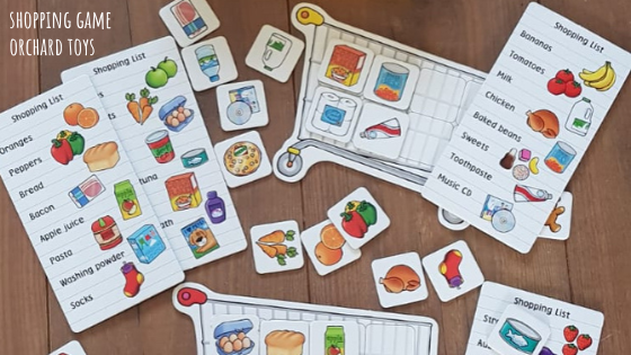
We're all so busy trying to keep little ones stimulated indoors, which I know from my own experience can be challenging, but we're all in this together and you're all doing a terrific job! We can't wait to throw open our doors again and welcome lots of old and new faces to Little Starlings, my goodness we're missing you all. We have lots of exciting things planned this term and our topics will be focusing on animals and where they live....What animals might you see at the farm? Discussing what animal babies are called? What noises do they make? Do they have feathers or fur? Lots of exciting things to talk about whilst developing language and understanding. We will also be focussing on Summertime....Where have the children been on holiday? How might they get there by plane or by car? Is it hot or cold on holiday? Fun things we do when we get there, ice-creams and sand castles are always a good place to start and a huge hit with our Starlings children! We can't wait to get started 😊 Our aim as always at Starlings is to gently encourage independence, stimulation within a nurturing, safe environment. Please do continue to check in on our Facebook and Instagram page as they're still lots of ideas & activities to do at home. Also for old & new families please join our closed facebook group, Little Starlings Family, its a really nice space to share ideas, concerns and get to know each other a little better. We'd love you to share your experiences with your starlings family so don't forget to tell us what you've all been up too. Stay safe and we hope to see you all soon! So how is everyone holding up? This week would have been the first week of our Summer Term. Sadly we have not able to reopen, so instead we have pulled together a few play based learning activities for you and your little ones, to keep them busy and stimulated whilst while we juggle with challenges of lockdown. HIDDEN SHAPES/COLOUR GAMESThese games provide great multi sensory learning opportunities that keep little ones amused, while encouraging speech & understanding as well as honing fine motor skills. Little ones love the excitement of discovering the hidden surprises. This is a great for supporting speech & understanding, for example 'What colour did you find? Can you find the blue dot? To create this game you will need: Transparent serving/oven dish Piece of card A marker pen Rainbow rice* A paint brush Make your rainbow rice in advance so that it is completely dry before use. Mark out your shapes (letters or colour dots) on the sheet of card, and then line your dish/tray with the card. Cover the card with the rainbow rice and demonstrate how to uncover the hidden surprises with a paintbrush. Let you little ones carry on the game, prompting them with phrases like “What colour have you found now?” to encourage them to share their discoveries with you. With a tiny bit of prep this is a great game to have on hand to pull out quickly. You can also reuse the rice for other sensory play games when you’re finished – the sound of transferring rice from different containers can keep children entertained for some time. *(To make rainbow rice head over to www.littlebinsforlittlehands.com/dye-rice-sensory-play-colored-rice/) SCISSOR SKILLS Scissors can be tricky things for little hands to master and paper or card are not always the most cooperative learning materials as they wobble and bend. Play dough is a much more forgiving material and can allow children to understand how to control the force they use as well as the fine motor coordination. All you need is some soft play dough, rolled into some wriggly worms or snakes and a pair of child safe scissors. Our children love using our Baker Ross child safe scissors*, as they are perfectly designed for little hands, but please remember that adult supervision is always needed for scissor skills activities. This game will keep little ones entertained for ages and is great for building concentration and hand/eye co-ordination. * (https://www.bakerross.co.uk/spring-loaded-scissors) PRE-WRITING SHAPESThis is a lovely, simple Montessori pre writing activity that helps children develop and learn shape structure in a multi sensory way. We shared a piece on this earlier in the week on the 9 pre writing shapes that form the foundation of future letter formation, but for this activity we are just focusing on the first four shapes. Don’t be concerned if your little ones struggle with some or all of these initially as these are milestone targets for 2-3.5 years. To create this game you need: a tray sand/ flour/salt paintbrush (or fingers are fine as well – just make sure they’re not tasting) This is a great (& calming) way to introduce children to pencil control and helps develop those all-important fine motor skills. LETTER RECOGNITION GAMES Its never too early to start introducing letters to children and what better way than this simple, creative activity. Children have great fun placing beads or rice in the cut out cardboard letters. Perhaps introduce them to the letters in their name and the sounds the letters make (phonics) To create this game you need: cardboard craft knife pens rice/beans SHAPE RECOGNITION Shape hunts are perfect for getting the whole family involved and are bound to keep the little people amused for ages (in certainly did in our house!) Just download our templates (https://bit.ly/3bEuRfa) and away you go. A shape hunt is great for encouraging vocabulary, understanding and shape recognition. Have fun and happy shape hunting LAVA LAMP EXPERIMENTThis is a great science experiment to do whilst at home and the children LOVE watching the 'magic' happen. Check out the demo we did in our Instagram highlights! You will need: Large waterproof cylinder or vase Water (to fill almost to the top of your cylinder) Water beads (we have some on our Amazon list: http://amzn.eu/edWLwqz) Alka-seltzer tablets Firstly ‘grow’ your water beads overnight (Depending on the beads 4-8 hours should do it) Then add the water beads to the empty cylinder and fill with water almost to the top. The exciting bit is to drop two alka-seltzer tablets in and wait for the dancing beads to happen. This is a wonderfully calming and mesmerising experiment, which is great for creating some calm in amongst the craziness. We hope you enjoy it as much as we did! An little top tip: you might want to have a few back up alka-seltzer tablets in stock as you will definitely be asked to do this experiment more than once! LEARNING GAMES Who doesn't love an orchard toy game and one of our favourites at Little Starlings is the shopping list game (Find it on our Amazon list: http://amzn.eu/edWLwqz)
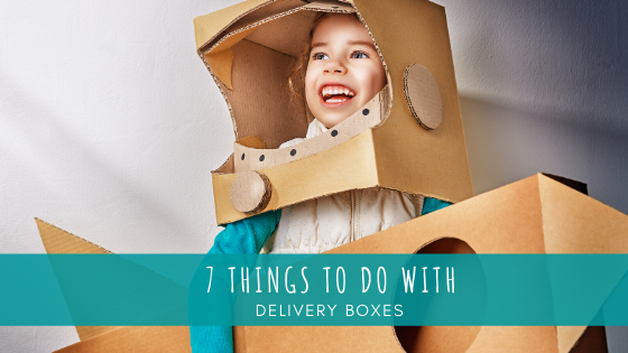
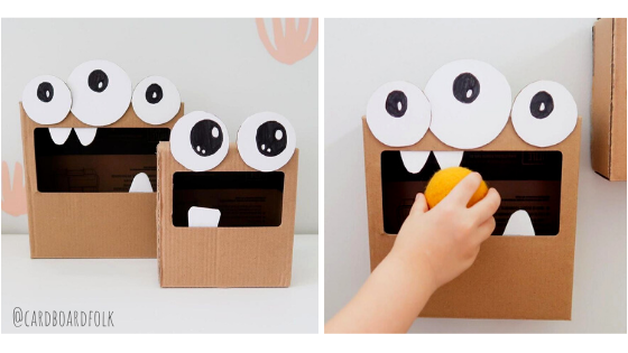
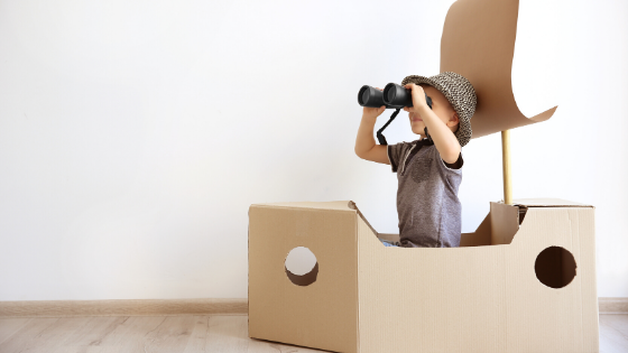
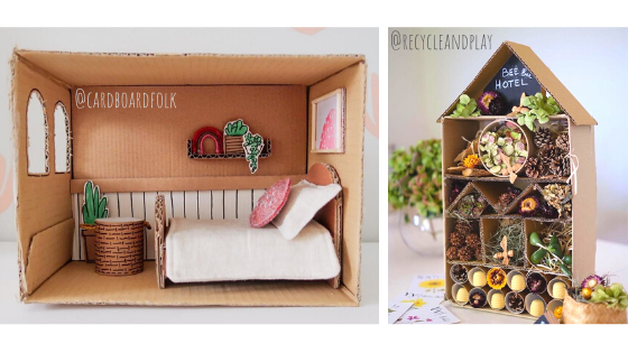
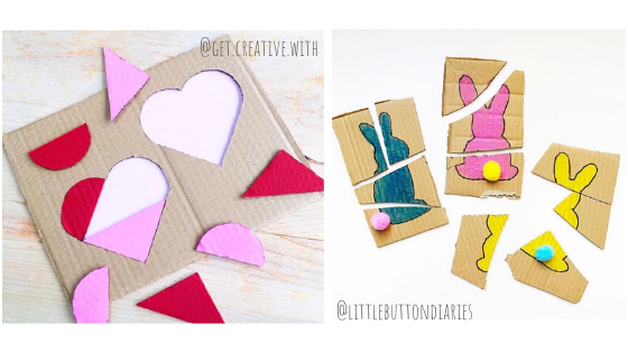
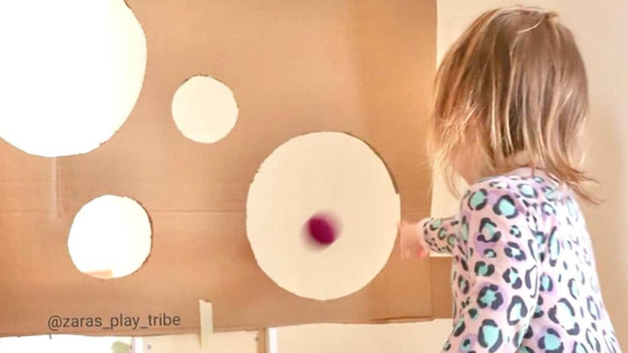
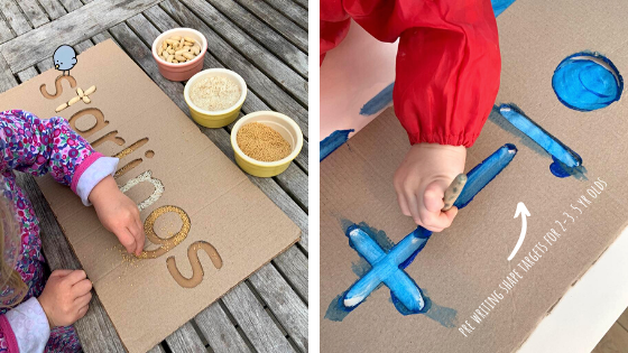
This is such a sweet little game that encourages speech & language, patience (for parents & children) and turn taking. A great game for all the family and always a winner at our house. We hope you enjoyed the blog and that it finds you all well. Stay safe and please don't forget to share your photos with us x Who else has a pile of delivery boxes building up? We certainly do, so this week we thought we'd see how all those boxes could be put to good use with a few creative play ideas. Here are 7 things, 1 a day, that you can create with your stockpile of cardboard delivery boxes. Create your very own little monster pet like these cuties from @cardboardfolk Then practice some motor control skills by feeding your monster all sort of different size and shaped treats by posting toys into their hungry mouth. Zoom, zoom, zoom into space in your very own rocket! Rockets are great fun to build and they can be as simple or elaborate as you like. Just gather up your largest boxes to make the rectangular body of the rocket. Cut out 1 or 2 circular windows. Then make a pointed cone for the top of the rocket - cover in tin foil if you're wanting to go super authentic. Draw in some control switches on the inside and get ready to blast off! Or how about sailing "in and out of weeks, through a night and day to where the wild things are" in a little cardboard box sailing boat, complete with paper sail! If you're feeling particularly creative, why not build a little dolls house or a doll's room like this amazing one from @cardboardfolk or perhaps a bug hotel for the garden like this one from @recycleandplay If you're tired of your old puzzles, why not make some new ones in your favourite shapes, like these little hearts from @get.creative.with and bunnies from @littlebuttondiaries Thinking about preschool home schooling ideas as we head back to 'home' school next week, why not build those gross motor skills, with a simple circus style throwing game like this one from @zara_play_tribe Or help little ones work on their letter recognition, with a multi sensory approach, by filling cardboard letter shapes with textures like rice, beans or sand.
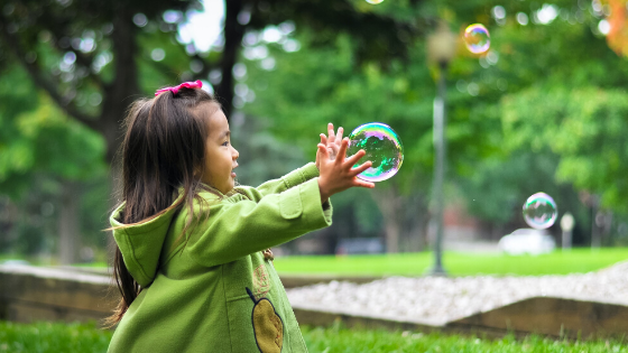
Alternatively get your little ones to paint through pre writing shapes so they can start to get a feel for how letters are formed. For preschoolers the pre-writing shape targets are: vertical line (|) 2 years, horizontal line (-) 2.5 years, circle (o) 3 years and a cross (+) by 3.5yrs. A quick COVID safety note, current research has found that the virus can live on cardboard for up to 24 hours, so to be on the safe side, leave any boxes aside for this period before getting creative. https://www.theguardian.com/us-news/2020/apr/04/how-long-does-coronavirus-live-on-different-surfaces Happy creating and don't forget to share your creations with us xx Have you ever met a child that doesn't love bubbles? I only have to mention getting out the bubbles and the little ones are skipping around me with joy! So I thought as its Easter weekend I'd share my secrets jumbo bubble mix and wand with you all! Did you know, that aside from being hours of (very portable) fun, bubbles actually provide loads of brilliant playful, learning opportunities as well. For example, bubbles are a brilliant way to help your child develop their visual tracking skills, from as young as babies. They also provide great motivation for Toddlers to get up and move, while using body awareness sense, developing muscle tone, balance and coordination as they try to catch and pop the bubbles. Throw on their favourite Disney playlist and you have a great mood booster as well. For older children, who are able to hold their own bubble wand, they gain invaluable fine motor skills and control, by grasping the wand & dipping it into the pot, which is all really beneficial in preparations for learning to write. The, not so, simple act of blowing bubbles is also a brilliant exercise for strengthening the muscles in the jaw and mouth, which is a great way to support speech development. But I think the best benefit of bubble play is the overall calming effect they have on children - something we all need a little bit more of at the moment. To make a batch of our mega bubble mix you will need: 12 cups of soft water* 1 cup fairy liquid 1 cup corn starch 2 TBSP baking powder Stir these ingredients, in this exact order (this practically counts as science (wink)), in a clean bucket, VERY gently *To make your water soft, boil it & leave the lime scale behind. Tip: keep a large serving spoon in your bucket to skim off foam (the enemy of bubbles) and keep stirring up from the bottom. You can use this bubble mix with any kind of bubble wand but if you want to make your own MEGA bubble super loop wand you will need:
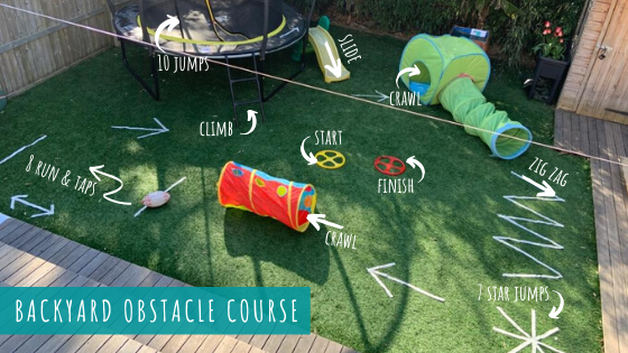
2 eyelet screws 2 x 1m long dowelling rods (1.5cm diameter) 3 m cotton rope (need to be 100% cotton) 2 washer to weigh down the mid point Start by screwing an eyelet into one end of each of the two doweling rods. Then tie two washers into the centre of your rope & secure with a large knot in the centre to form the point of your triangle. Then thread the lose ends of the rope through the eyelets, tying to secure about a third of the way down the rod. Finally, tie the two loose ends together to complete your loop…and you're ready to go…! Check out this helpful video from @cottagelife to help you construct your super loop: https://youtu.be/nSoPmerE_5I Wishing you all a wonderful Easter! Stay safe and look forward to hearing from you all soon x Hurray, we’ve made it through week 2 of lock down, but cabin fever is really starting to set in, isn’t it. If your little energizer bunnies need some contained energy burning activities, we’ve got a few ideas that might help. Obstacle courses, of any form, provide an amazing wealth of skill & strength development opportunities, as well as releasing pent up energy in a controlled way. Here are 5 great benefits that come from doing obstacle courses:
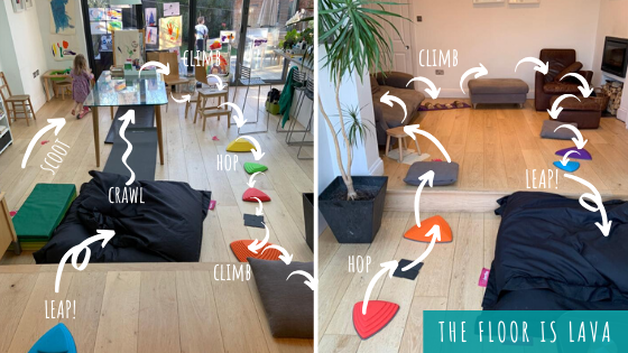
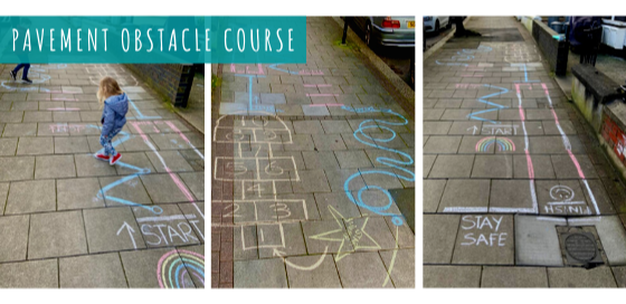
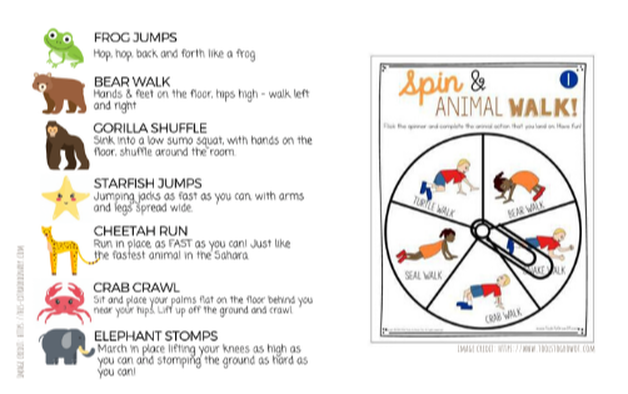
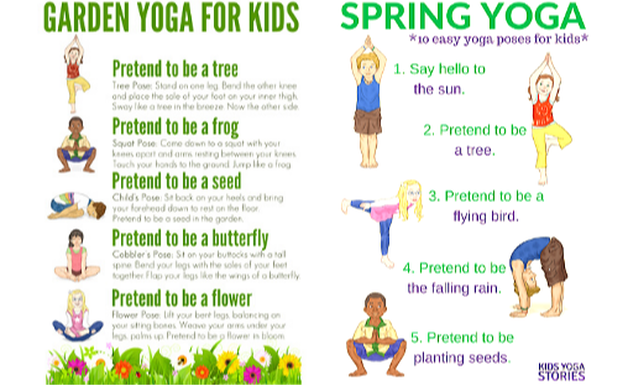
BACK GARDEN OBSTACLE COURSEIf you have a bit of space & a few props, a back garden obstacle course is a great way to encourage kids, of all ages, to get off the sofa & get some fresh air! And if you can get them involved in creating the course their creativity can go wild & they’ll be much more likely to spend more time on this activity. You can make the course as complex or as simple as you like. A few simple strips of masking & a sequence of star jumps, sprints and balancing is all you need. But if you do have some other props to add into the course to create high & low levels as well as using difference muscle groups – such crawling vs sprinting – the greater the benefits. Here are some ideas of things you could use to create an outdoor obstacle course: Masking tape (your new best friend!) ELC Egg & spoon race set Pop up tunnels & tents Hoops Cones Jumping sacks Printable foot & handprints Bouncers Beanie bags For more inspiration why not checkout these links: https://playtivities.com/obstacle-courses-for-kids/ https://theinspiredtreehouse.com/creative-obstacle-course-ideas-kids/ Also check out our local @chalkboard.biz for props you could add to your course. THE FLOOR IS LAVA! INDOOR OBSTACLEImagine the floor is a bubble sea of lava & there is only one safe path through. You can create a 'safe' course out of anything you have to hand, but it works best if you have a range of high and low points, also if you can incorporate different textures it makes it more fun & varied. Printable hand & footprints are also great for creating 'safe' stepping-stones or to incorporate 'Animal walks' (see below) into your course. The floor is lava is a great (but slow paced) energy burner that can keep kids occupied for ages! Not to mention building gross motor skills, core strength, cognitive planning & sequencing, as well as team work if they are doing the course with a sibling! Just remember, whatever you do, DON'T TOUCH THE FLOOR! Here are some ideas of things you could use to create your own course: Yoga mats Cushions Beanbags Foam squares Step stools & chairs Printable foot & handprints Gonge River Stones (https://www.amazon.co.uk/Gonge-1137385-River-Stones/dp/B000ANIVRG) CHALK COURSEA pavement chalk course is super quick and easy to set up & there's no mess to clear up either, as good dose of rain or the street sweeper will do that for you. Also by creating your course on the pavement outside, means your neighbours & passers by can enjoy it too (one at a time & at a safe distance). It’s really nice for the kids to see friends, from their windows, enjoying the course too. A chalk course can be adapted to any age group, but a good mix of running, jumping, hopping & balancing always work well. Also a variety of fast & slow pace is great for energy burning & motor control. For other chalk games, check out this: https://www.connectionsacademy.com/support/resources/article/fill-a-summer-of-fun-with-sidewalk-chalk-activities This is a really fun & creative way to burn some energy in a small space with no additional props, regardless of the weather. Kids love pretending to act like their favourite animals and it’s a brilliant way to develop gross motor skills and core strength, as well as turn taking skills. They can also be a great addition to an obstacle course as they can provide a greater range of movement & muscle use. These exercises also have a calming effect as the animal walks help kids receive deep pressure to their joints and limbs, which help strengthen their sense of balance, and develop body awareness. To set up your game, you can either make a picture spinner like the one’ Tools to Grow OT’ have used (above) & take turns spinning to see what animal you land on. Alternatively you can print out pictures of your chosen animals & turn one over at a time & do the corresponding animal walk. For more Animal Walk inspiration take a look at this article from Pathways: https://pathways.org/help-your-childs-gross-motor-skills-with-these-animal-walks/ YOGA FOR KIDSIf you need something instant, Cosmic kids yoga (on YouTube) is great with loads of theme routines - everything from the Hungry Caterpillar to Disney movies, there's even a series of Star Wars routines! Alternatively, if you're looking to reduce screen time there are some great printable kids flow cards. We love the Garden & Spring sequences (above) from Childhood 101 & Kids Yoga Stories. https://www.kidsyogastories.com/yoga-for-spring https://childhood101.com/yoga-for-kids-a-walk-through-the-garden COSMIC KIDS: https://www.youtube.com/user/CosmicKidsYoga AFTERNOON DISCOParticularly great on grey, rainy days, when it’s a bit darker in the afternoon. Put together a little playlist of your little ones favourite tunes or use one of the readymade play lists on Amazon Music (everything from nursery favourites to Disney theme tunes).
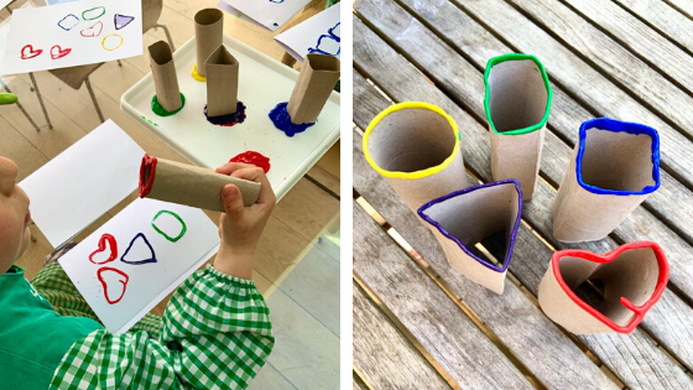
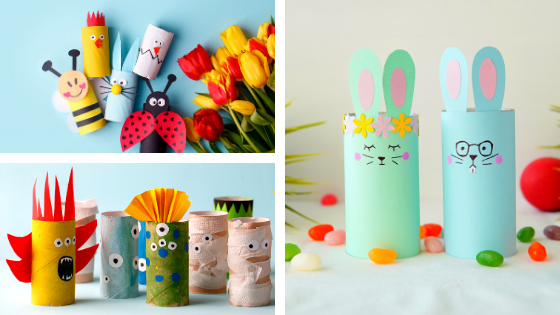
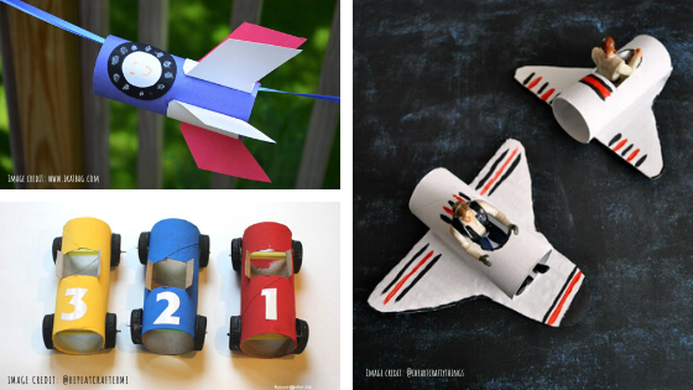
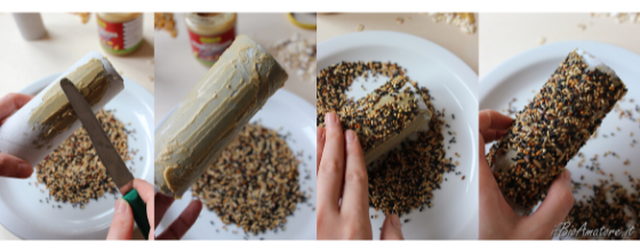
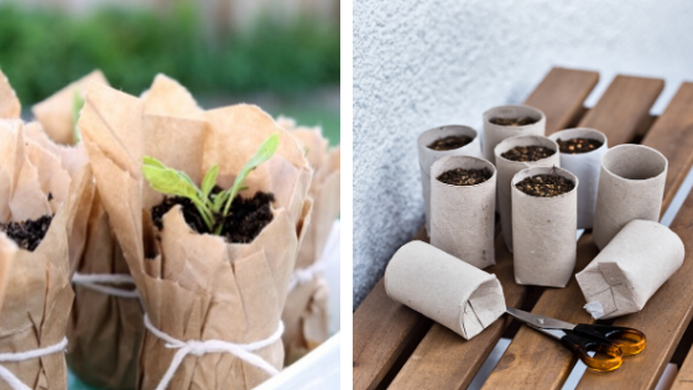
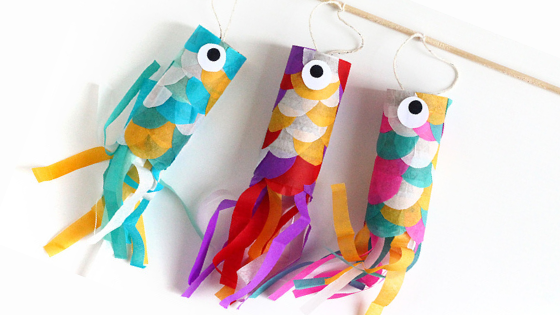
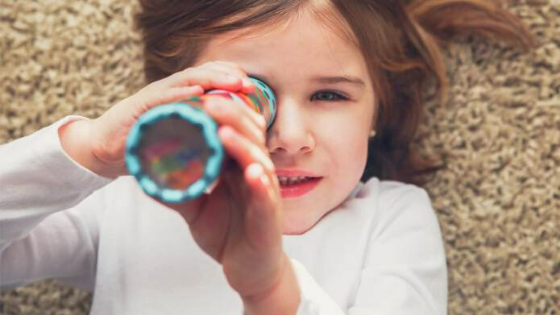
If you have a little plug in disco light even better! (We have one included on our Amazon ideas list: http://amzn.eu/edWLwqz ) Also bubbles are always a welcome edition! Head to the darkest room in your home, switch of all the lights & dance like no one is watching! Both brilliant for burning energy as well as lifting the mood – its very hard to feel down or frustrated when your dancing your heart out to a Disney classic! Enjoy x Chances are you might have a couple of extra loo rolls around the house at the moment, so we’ve pulled together an activity a day to put them to good use. 1. SHAPE STAMPINGTo get started Shape Stamping is a super simple & really quick activity to set up. Just reshape 4 or 5 rolls into shapes – square, rectangle, triangle, heart & circle are our favourites. Then dip the ends into different coloured paint and off they go. Great for making cards to send to friends or grandparents while we’re in isolation. 2. CREATE A CREATURE Loo Roll creatures are another quick & easy activity to pull together at a moments notice. They’re also great for getting your little ones to explore their creativity. Bunnies, bugs or crazy monster creations, whatever your little ones would like (& craft supplies allow). You will need some coloured card & paper, googly or sticker eyes and any other decorations you have to hand. Set them out on a tray with some glue. Then wrap the rolls in coloured paper, cut out any features like ears or antennas from card ready to glue on, then embellish however you would like. 3. CARS, ROCKETS & THINGS THAT FLYSimilar to creature creating, there is also a huge range of vehicles that can be made from loo rolls. Why not try a racing car (check out the link below for instructions) or how about a space shuttle or our favourite a flying rocket! To make the flying rocket you will need a loo roll, some coloured card & coloured paper, maybe some glitter pens or stickers if you have them. Wrap the roll in coloured paper, cut out 4 rocket wings and decorate. Make a cone of card for the top of the rocket, but leave a good gap to thread the string through. Thread your rocket onto your string, then hook up your string, making sure it’s nice and tight. Do a dramatic countdown & blast your rocket off along the string. See how far you can get it to go. Follow this link for instruction to make racing cars: https://www.repeatcrafterme.com/2013/04/toilet-paper-roll-race-cars.html 4. BIRD FEEDER Attract some wildlife to the garden, for little, eagle eyed nature watchers, with a homemade bird feeder. You’ll need a loo roll, some peanut butter (or coconut oil/sunflower butter), birdseed mix and some string. Start by covering the outside of toilet paper roll with peanut butter (or substitute). Then roll the peanut butter covered toilet paper roll in the birdseed until covered. It works best if you get a really thick covering of seeds. Finally thread a piece of twine through the toilet paper roll and hang somewhere ideally out of reach of squirrels. 5. SEEDLING PLANTERAnother quick and easy idea for the garden is to create some little biodegradable seedling pots out of loo rolls. Plant seeds in them, then as the seedlings grow you can transfer them directly into your garden as the ‘pot’ will decompose in the soil. To make these you will need a parent to help with the snipping. Start by making four cuts in the roll about a third of the way up. Then fold the cut area on the bottom like you would to close a box. Then fill with some light potting soil and add your seeds. Sit them in a waterproof tray or dish on a nice sunny windowsill, keep them regularly watered and watch the magic happen. Once the seedlings are strong enough you can transfer them to the garden. 6. FLYING FISHIf you’re feeling a bit more adventurous, why not try making some of these beautiful windsock fish from Squirrelly Minds. Little ones might need a bit more of a hand with these ones but they are a really nice thing to make together. All you’ll need is a few toilet rolls, some coloured tissue paper (we love the craft it mini tissue squares from Baker Ross), some double sided tape or glue & some string. You’ll find full instructions here: http://squirrellyminds.com/2013/05/03/koinobori-japanese-flying-carp-diy/ 7. KALEIDOSCOPEFor something much more complicated, but well worth the effort, why not make your own kaleidoscope. Children will love looking at the beautiful coloured patterns they can create simply by spinning their kaleidoscopes.
This one works better with a paper towel roll but it can still work with a toilet paper roll as well. Head over to this link for detailed instructions: https://www.sheknows.com/parenting/articles/1008403/diy-kaleidoscope-craft-for-kids/ We’d love to see your creations so please keep us posted on our Facebook page & group. Happy crafting x |
AuthorOur Blog Archives
July 2020
Categories
All
|





 RSS Feed